|
 20 April 2020, 11:53
|
#1
|
|
Member
Country: UK - England
Town: Plymouth
Boat name: Sea Dragon
Make: Tornado Viking
Length: 6m +
Engine: 100 Yammy
Join Date: Sep 2014
Posts: 380
|
AIS Backing Plate
Like most people I have time on my hands, so the boat rewire looks like a nice project to keep me sane.
First priority is to fit an AIS Transceiver, mainly because the boat's radar return is so poor.
I dont want to drill through the console, there are already enough blemishes from previous bits and bobs. So I have 3D printed a backing plate, specced exactly to match the drill holes in the AIS, my idea being to epoxy that inside the console and then clip/screw the AIS to that.
Has anyone attempted similar, will it hold up to bouncing about?
|

|

|
|
20 April 2020, 11:59
|
#2
|
|
Member
Country: UK - England
Town: South Yorks
Boat name: Black Pig
Make: Ribcraft
Length: 5m +
Engine: DF140a
MMSI: 235111389
Join Date: Feb 2008
Posts: 12,206
|
Quote:
Originally Posted by Obsidian

Like most people I have time on my hands, so the boat rewire looks like a nice project to keep me sane.
First priority is to fit an AIS Transceiver, mainly because the boat's radar return is so poor.
I dont want to drill through the console, there are already enough blemishes from previous bits and bobs. So I have 3D printed a backing plate, specced exactly to match the drill holes in the AIS, my idea being to epoxy that inside the console and then clip/screw the AIS to that.
Has anyone attempted similar, will it hold up to bouncing about?
|
Should be fine. All my gubbins inside the console are mounted on 2 backing plates. They carry the lot, AIS, fire extinguisher, fuel filter, autopilot pump & controller etc. The backing plates are fixed to spacer battens that stand off the inside face of the console. I can fix whatever I want without drilling through the console face.
__________________
Rule#2: Never argue with an idiot. He'll drag you down to his level & then beat you with experience.
Rule#3: Tha' can't educate pork.
Rule#4: Don't feed the troll
|
|
|
|
|
20 April 2020, 14:13
|
#3
|
|
Member
Country: UK - England
Town: Plymouth
Boat name: Sea Dragon
Make: Tornado Viking
Length: 6m +
Engine: 100 Yammy
Join Date: Sep 2014
Posts: 380
|
Thanks PD
|
|
|
|
|
20 April 2020, 14:43
|
#4
|
|
Member
Country: UK - England
Town: Plymouth
Boat name: Sea Dragon
Make: Tornado Viking
Length: 6m +
Engine: 100 Yammy
Join Date: Sep 2014
Posts: 380
|
Pic of the plate and AIS, four 4mm raised parts on the corners line up with the mounting holes - on the table it makes for a solid fit.
|
|
|
|
|
20 April 2020, 15:01
|
#5
|
|
Member
Country: UK - England
Town: Waterlooville
Boat name: Tickler
Make: Halmatic P22
Length: 6m +
Engine: Inboard Diesel 240HP
MMSI: 235115642
Join Date: Sep 2015
Posts: 1,777
|
Have you tapped the 3D part to attach the AIS?
I like the idea of printing stuff in 3D but I can't quite justify buying one yet.
The bit of the picture that departs from my mental image is that I anticipated the backing plate to be offset from the console and then you could bolt through the backing plate without affecting the console.
My backing plate in the console is as big as I could make it as it allows for 'expansion' but I guess that would defeat the object of the 3D printing.
__________________
|
|
|
|
|
20 April 2020, 15:16
|
#6
|
|
Member
Country: Other
Town: Principalite d'Chaos
Boat name: The Nashers Revenge!
Make: Windsor Brothers
Length: 6m +
Engine: Optimax 225
MMSI: "Mmmmm SI" she said!
Join Date: Jan 2004
Posts: 4,944
|
I did exactly what you are suggesting for my Raymarine Fishfinder module about 10yrs ago.
Although I did it with a plywood pad which I glued in place with thickened West System Epoxy then flowcoated it.
I'll see if I can find an image.
It's been fine, I wouldn't want to try and remove it.
Nasher
__________________
|
|
|
|
|
20 April 2020, 15:19
|
#7
|
|
Member
Country: Other
Town: Principalite d'Chaos
Boat name: The Nashers Revenge!
Make: Windsor Brothers
Length: 6m +
Engine: Optimax 225
MMSI: "Mmmmm SI" she said!
Join Date: Jan 2004
Posts: 4,944
|
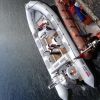
Top Right here:
As you can see, my console has been modified several times.
Nasher.
__________________
|
|
|
|
|
20 April 2020, 15:45
|
#8
|
|
Member
Country: UK - England
Town: Plymouth
Boat name: Sea Dragon
Make: Tornado Viking
Length: 6m +
Engine: 100 Yammy
Join Date: Sep 2014
Posts: 380
|
Quote:
Originally Posted by GuyC
Have you tapped the 3D part to attach the AIS
|
Yep, there is a threaded insert to accept the M4 machine screw on each side, these fit the slotted holes in the AIS so the screws can be in place first, then the AIS dropped in and everything tightened up.
Really Like Nasher's set up, kind of wish I had done down that route now!
|
|
|
|
|
20 April 2020, 15:54
|
#9
|
|
Member
Country: UK - England
Town: Plymouth
Boat name: Sea Dragon
Make: Tornado Viking
Length: 6m +
Engine: 100 Yammy
Join Date: Sep 2014
Posts: 380
|
Pic of the threaded insert, they are really strongly held in place. To get one out I have to cut the material around it and lever it out.
|
|
|
|
|
20 April 2020, 16:03
|
#10
|
|
Member
Country: UK - England
Town: Waterlooville
Boat name: Tickler
Make: Halmatic P22
Length: 6m +
Engine: Inboard Diesel 240HP
MMSI: 235115642
Join Date: Sep 2015
Posts: 1,777
|
The backing plate works quite well as it allows you to fit it out before putting it into the boat. I've spaced mine away from the console side so I can bolt through it.
__________________
|
|
|
|
|
20 April 2020, 16:05
|
#11
|
|
Member
Country: UK - England
Town: Waterlooville
Boat name: Tickler
Make: Halmatic P22
Length: 6m +
Engine: Inboard Diesel 240HP
MMSI: 235115642
Join Date: Sep 2015
Posts: 1,777
|
Quote:
Originally Posted by Obsidian
Pic of the threaded insert, they are really strongly held in place. To get one out I have to cut the material around it and lever it out.
|
I like that although I tend to be a bit more agricultural.
__________________
|
|
|
|
|
 Posting Rules
|
You may not post new threads
You may not post replies
You may not post attachments
You may not edit your posts
HTML code is Off
|
|
|
|
 Recent Discussions
 |
|
|
|
|
|
|
|
|
|
|
|
|
|
|
|
|
|
|
|
|
|
|
|
|
|
|
|
|
|
|
|
|
|


 BLACK PIG
 Piglet
 Tickler