|
|
 22 April 2007, 21:29
|
#1
|
|
Member
Country: UK - England
Town: Surbiton,Gt London
Length: 5m +
Join Date: Nov 2003
Posts: 437
|
Trailer bearings
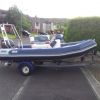
Having spent the day tidying up the trailer for the new season I now have some concerns about the bearings as there is some play if you hold the wheal and rock from side to side. I have had the trailer about three years and they have not been changed in that time (but well looked after) I would like to have a go at replacing them myself so I know how to do it if I ever have a problem on the road but have not done this before.
While the trailer is old its not in bad condition but there is no make on it and I cant see any names on the hubs etc. I have done a couple of searches but most of the information I have found assume you know the basics. Can any give a bit of help on this for me please? Its an unbreaked trailer and if the picture works looks like this.
Many thanks
__________________
Neal
Remember It is only possible to live happy-ever-after on a day-to-day basis
|

|

|
|
22 April 2007, 21:46
|
#2
|
|
RIBnet admin team
Country: UK - England
Town: The wilds of Wiltshire
Boat name: Dominator
Make: SR5.4
Length: 7m +
Engine: Yam 85
MMSI: 235055163
Join Date: Jul 2005
Posts: 13,070
|
You need to change them ASAP before a wheel falls off. Collapse can be sudden.
Assuming you've got taper roller bearings:-
Under the black plastic cap (which you can lever off) is the bearing retaining nut and split pin. Undo it and the whole lot comes out.
Take the whole hub/bearing unit to somewhere who sells them and ask what it is. Buy new hubs and bearings (it's not much more than bearings alone).
You need to tension the bearing when you reassemble it.You tension the bearing with the retaining nut you need the wheel to rotate freely without any play. Don't forget the split pin.
If you need more info than this, the best thing to do is to pay a trailer centre to do it for you and show you step by step.
__________________
Need spares,consoles,consumables,hire,training or even a new boat?
Please click HERE and HERE and support our Trade Members.
Join up as a Trade member or Supporter HERE
|
|
|
|
|
22 April 2007, 21:50
|
#3
|
|
Member
Country: UK - England
Town: Enfield/Switzerland
Boat name: Zonneschijn II/Vixen
Make: Shakespeare/Avon
Length: 7m +
Engine: Evin' 175 DI /Yam 90
MMSI: 235055605
Join Date: May 2006
Posts: 1,436
|
Neal,
Step by step gide here (read full thread as there were a couple of small corrections made to my steps).
http://rib.net/forum/showthread.php?...&highlight=hub
Hope this helps.
Neil
Matt, just seen your reply. Do you go with no play at all? Don't they bind if you do that? I was always told tight, and a slight turn (1/4 or so) back so they have a tiny bit of play
__________________
|
|
|
|
|
22 April 2007, 22:00
|
#4
|
|
RIBnet admin team
Country: UK - England
Town: The wilds of Wiltshire
Boat name: Dominator
Make: SR5.4
Length: 7m +
Engine: Yam 85
MMSI: 235055163
Join Date: Jul 2005
Posts: 13,070
|
Quote:
Originally Posted by Neil Harvey

Neal,
Step by step gide here (read full thread as there were a couple of small corrections made to my steps).
http://rib.net/forum/showthread.php?...&highlight=hub
Hope this helps.
Neil
Matt, just seen your reply. Do you go with no play at all? Don't they bind if you do that? I was always told tight, and a slight turn (1/4 or so) back so they have a tiny bit of play |
I do them the same way I do car bearings and bike headstocks-tighten til there's no play but rotation isn't slowed. It's quite easy to achieve if you use plenty of grease. Taper rollers wear faster if there's slack in them.
If the castellated nut doesn't line up with the split pin at that point I'll back it off til it does rather than over tighten.
__________________
Need spares,consoles,consumables,hire,training or even a new boat?
Please click HERE and HERE and support our Trade Members.
Join up as a Trade member or Supporter HERE
|
|
|
|
|
23 April 2007, 08:06
|
#5
|
|
Member
Country: UK - England
Town: Surbiton,Gt London
Length: 5m +
Join Date: Nov 2003
Posts: 437
|
Thanks gents I will have a look at them tonight, does not sound too bad a job. I will have a look on the web for local trailer centre today. Last night found some bearings in a box of bits the bloke i got the trailer from gave me so that could be an option to make them safe in the short term.
__________________
Neal
Remember It is only possible to live happy-ever-after on a day-to-day basis
|
|
|
|
|
23 April 2007, 08:48
|
#6
|
|
Member
Country: UK - Scotland
Town: fife
Make: Humber / searider
Length: 5m +
MMSI: ... - - - ...
Join Date: Sep 2005
Posts: 720
|
I got my last lot of bearings from Indaspention and they where (top of my head £11) but the chap in the shop offered me new hubs with bearings fitted for about £14.  Guess which ones I got. Bit of grease and away you go.
Going to replace them once more this week.
__________________
The only difference between men and boys, is the price and size of their toys
|
|
|
|
|
23 April 2007, 08:58
|
#7
|
|
Member
Country: UK - England
Town: Aylesbury
Length: no boat
Join Date: Jul 2006
Posts: 345
|
Quote:
Originally Posted by Neil Harvey
Matt, just seen your reply. Do you go with no play at all? Don't they bind if you do that? I was always told tight, and a slight turn (1/4 or so) back so they have a tiny bit of play
|
This is also how I was told to do mine (by everyone, including the bloke who sold me the parts) - 1/4 turn back. This allows you to move the wheel from side to side, very very slightly once assembled.
__________________
|
|
|
|
|
23 April 2007, 10:49
|
#8
|
|
RIBnet supporter
Country: UK - England
Town: Rutland
Length: no boat
Join Date: May 2006
Posts: 2,500
|
Quote:
Originally Posted by wavecrosschris
This is also how I was told to do mine (by everyone, including the bloke who sold me the parts) - 1/4 turn back. This allows you to move the wheel from side to side, very very slightly once assembled.
|
1/4 turn back sounds a lot we only take them back if the castle nut doesn't line up and then only a minimal amount, most important is to grease them and use it when you assemble the bearings so they go in wet 
__________________
|
|
|
|
|
23 April 2007, 12:01
|
#9
|
|
Member
Country: UK - Scotland
Make: HumberOceanOffshore
Length: 8m +
Engine: Volvo KAD300/DPX
Join Date: Oct 2002
Posts: 5,596
|
Quote:
Originally Posted by wavecrosschris
- 1/4 turn back.
|
Unless you cross-drill the end of the stub axle, you can't do a ¼ turn back cos the nut has six sides. Tighten them firmly and spin the wheel to seat the bearings, slacken them back, take up all the slack again and undo the nut one or two flats. Fit the split pin. I say one or two flats because there is always a bit of give in the thread clearance, thrust washer etc. and it varies a little from wheel to wheel. It also depends how heavy handed you are with the instruction 'take up the slack'.
However, Neal, judging from your picture, I wouldn't be surprised if the bearings are fine and you only need to regrease and adjust them.
__________________
JW.
|
|
|
|
|
23 April 2007, 12:56
|
#10
|
|
Member
Country: UK - England
Town: Surbiton,Gt London
Length: 5m +
Join Date: Nov 2003
Posts: 437
|
Quote:
Originally Posted by jwalker
However, Neal, judging from your picture, I wouldn't be surprised if the bearings are fine and you only need to regrease and adjust them.
|
Hi JW the picture could be giving a false view as i spent the weekend cleaning all the trailer etc i did notice a lot of grease on the rear of the wheels if that helps that i have not noticed before. When you say adjust them could you give some more details please. Is there better way to test them. There is not a lot of movment. Once i take them appart does that break a seal to stop them going back. I dont mind spending the money on new but want to learn from this.
Regards and thanks to all
__________________
Neal
Remember It is only possible to live happy-ever-after on a day-to-day basis
|
|
|
|
|
23 April 2007, 13:09
|
#11
|
|
Member
Country: UK - England
Town: Aylesbury
Length: no boat
Join Date: Jul 2006
Posts: 345
|
Quote:
Originally Posted by jwalker
Unless you cross-drill the end of the stub axle, you can't do a ¼ turn back cos the nut has six sides. Tighten them firmly and spin the wheel to seat the bearings, slacken them back, take up all the slack again and undo the nut one or two flats. Fit the split pin. I say one or two flats because there is always a bit of give in the thread clearance, thrust washer etc. and it varies a little from wheel to wheel. It also depends how heavy handed you are with the instruction 'take up the slack'.
However, Neal, judging from your picture, I wouldn't be surprised if the bearings are fine and you only need to regrease and adjust them. |
sorry having only done it once 1/4 (or maybe it was a half?...  ) turn back. i had to turn back to find the nearest hole as the other way over tightened them. basically finger tight then back the other way to find the nearest hole. I was just agreeing i'd rather have them slightly loose than tight anyway...
__________________
|
|
|
|
|
23 April 2007, 13:34
|
#12
|
|
Member
Country: Canada
Town: Tobermory, Canada eh
Boat name: Verius
Make: Zodiac Hurricane 590
Length: 5m +
Engine: Yamaha F150
Join Date: Oct 2006
Posts: 1,366
|
I take my trailer into a tire shop each spring and for less than $75.00, they pull the bearings and properly grease them. It's not worth getting messy for that! I also use "Bearing Buddies".
Most years, I put about 2500-3000 km on my trailer, most of it at high speed (100 to 120 kph) and never had a failure. (Fingers crossed!) A little preventative, maintainence goes a long way!
|
|
|
|
|
23 April 2007, 14:24
|
#13
|
|
Member
Country: UK - Scotland
Make: HumberOceanOffshore
Length: 8m +
Engine: Volvo KAD300/DPX
Join Date: Oct 2002
Posts: 5,596
|
Quote:
Originally Posted by Neal
..When you say adjust them could you give some more details please.
|
I did, in post #9!
Quote:
|
Once i take them appart does that break a seal to stop them going back.
|
No, you don't break a seal.
Quote:
|
I dont mind spending the money on new but want to learn from this.
|
I like your attitude...
Before you start, find a container of some description to put the parts into. An old margarine or ice cream tub does nicely. You'll need a roll of kitchen towel and/or a pile of rags. Pre rip it into separate towels. You'll also need a replacement split pin and hub grease as a minimum.
1 slacken the wheel nuts.
2 jack up the trailer and rest it on an axle stand.
3 remove the wheel nuts and the wheel.
4 lever off/tap off the black cover from the end of the hub.
5 bend the ends of the splitpin as straight as possible and remove it. Wipe it clean and place it into your tub so as not to loose it. You're going to do this with everything else too.
6 unscrew the large nut and store it.
7 remove the thrust washer.
8 remove the outer bearing race.
9 remove the hub by pulling it straight off the stub axle.
10 clear out the grease from the hub. If you use your finger, be careful, there are sharp edges in there.
Now is the time to judge whether you need to replace the bearings. Rinse the outer race in a solvent - white spirit or something similar- and wipe clean. Look at the rollers for signs of rust or pitting. The outer part of the bearing is still in the hub. Look at this for similar damage. There will be slight marking where the surfaces have been running together but they should be smooth. If there is any sign of damage, replacement is the solution.
Now, the rear bearing can't be inspected without removing the grease seal. However, if the first bearing is good and the grease shows no sign of water ingress then it is worth leaving the bearing and seal in place and testing it. Do this by laying the hub onto its studs, put two fingers through the seal and press them onto the bearing. Rotate the bearing by hand feeling for any roughness as you go. Get the bearing turned a couple of times to settle it before you decide. It should feel smooth with no roughness or catching.
I'm going to have to leave this cos I've got an appointment but I'll come back and complete it later....
__________________
JW.
|
|
|
|
|
23 April 2007, 15:39
|
#14
|
|
Member
Country: UK - England
Town: Gloucestershire
Boat name: Osprey
Make: Osprey Vipermax
Length: 5m +
Engine: E-tec 300 G2
MMSI: TBC
Join Date: Dec 2006
Posts: 4,021
|
Indespension
Indespension do a book that includes info on how to service bearings and brakes. You have to ask for it as they dont give it out without a fight!
It states in there that you do want a small amount of play and that Roller bearings are better run looser than tighter.
Chris
__________________
|
|
|
|
|
23 April 2007, 17:05
|
#15
|
|
Member
Country: Ireland
Boat name: Joy Ride
Make: Ribtec655CamelTrophy
Length: 6m +
Engine: 200 optimax
Join Date: Feb 2007
Posts: 208
|
I would definitely fit Bearing savers as well as new bearings/hubs especially if its a single axal trailer. Bearing savers are quite cheap and just fit on where the dust cap is, they are basically a spring loaded grease reservoir with an easily accessable grease nipple for refilling and in my opinion are essential if travelling any real distance with your trailer.
__________________
|
|
|
|
|
23 April 2007, 19:44
|
#16
|
|
Member
Country: UK - Scotland
Make: HumberOceanOffshore
Length: 8m +
Engine: Volvo KAD300/DPX
Join Date: Oct 2002
Posts: 5,596
|
Continued....
If this is the case, you can be fairly sure the bearing is fine because rust or pitting is easily felt.
The rebuild
11 carefully clean around the seal and in its groove to remove the grime and grease that will be there. Take particular care not to contaminate the inside area with dirt.
12 with grease, repack inside the grease seal grooves and the area between it and the bearing.
13 place a piece of paper towel over it to prevent dust contaminating the new grease.
14 clean all the dismantled parts in a solvent.
15 invert the hub and repack the whole of the inside of the hub with grease. Take care to ensure that the first filling is pushed into the rear bearing the best you can do it. Cover with a paper towel.
16 take hold of the outer bearing race and pack it with grease working it between the rollers and the cage. Lay this to the side and cover it with a paper towel.
17 clean the stub axle thoroughly and apply a light coating of grease to all its surfaces.
18 remove the paper towels from the hub an push it squarely onto the stub axle. While continuing to hold it in place with one hand, lift the bearing race from its protective towel and fit it into the hub. Transfer one hand to keep a finger on the bearing and fit the thrust washer followed by the nut.
19 adjust the bearing and fit a new split pin.
20 finally, refit the dust cap.
Ok, thats a service but it doesnt properly check the rear bearing nor does it cover the condition of the grease seal. Below is the procedure for removal and replacement of both bearings and the seal. It can be fitted into the above procedure replacing steps 11 to 16.
a Source your replacement bearings, seals, splitpins and water resistant grease.
b make or source a drift for removing the bearings. I use a piece of mild steel about 20 x 6mm.
c put a flat bladed screwdriver or other lever under the edge of the grease seal and lever it up until it comes free of the hub. For reference, it may be interesting to compare it with a new one just to get an indication of the amount of wear which has taken place over time.
d lift out the rear bearing race.
e look inside the hub to identify the small recesses behind the bearings.
f place the hub onto a firm surface, set the drift into one of the recesses and hit it smartly with a hammer. Transfer the drift to the opposite recess and hit it with the hammer. Drive out the bearing track completely by repeating this as necessary.
g invert the hub and repeat the process on the second bearing track.
h use solvent and a small paint brush to thoroughly clean the hub and then wipe it dry.
Now comes the replacement of the bearing tracks and there are various tool for doing this but Im going to presume you have the same ones as me and that is a hammer and drift. You may get warnings from some folk about exploding bearings and all sorts but Ive never been ham-fisted enough to damage a bearing in any way and Id quite like a £ for every one Ive fitted.
Getting the track started nice and square in its recess is the tricky bit. But before you start this, stick your hammer, drift and old bearing tracks into the solvent tub and clean them well. Also wash your hands and keep a clean rag at your side for wiping your fingers because, from this point on, cleanliness is important.
i remove your bearings from the packaging, rinse them clean, pack the races with grease and cover them to keep dust out.
j place the cleaned hub on a firm surface and lightly oil or grease the bearing recess.
k select the appropriate bearing track, lightly lubricate it and place it as squarely as possible into its recess.
l place the old bearing track onto the top of the new one and, while pressing firmly on one side with a thumb, tap lightly on the opposite side using the hammer to locate one edge of the bearing into the recess. Repeat this on opposite sides until you are sure it is just located in the start of the recess. At this point you must check visually to ensure it is square and then tap it on alternate sides working it down the recess tap by tap. When it bottoms out you will know. The feel of the hammer blow becomes very firm. It may be that the old bearing, which you are hitting, will locate itself into the top of the recess if the recess is deeper than the track. In this case use the drift to drive the bearing fully home.
m repeat this for the other bearing.
n wipe over the tracks and inside the hub because some debris is bound to have dislodged itself from the hammer.
o when you are sure all is clean, pack the hub with grease. Fit the previously packed rear bearing race into its track, grease the new seal and push it or tap it into its recess until it is flush. A flat piece of wood can be positioned onto the seal to finally drive it home and this will ensure it is evenly placed. Ensure the space between the bearing and grease seal is full of grease and pick up at about stage 17.
Adjusting the bearings.
1 tighten the nut firmly (Firmly = take up the slack and apply pressure to the spanner with a couple of fingers.) and spin the hub to seat the bearings. The hub should feel smooth but there will be resistance to turning.
2 slacken the nut, take up all the slack again and then unscrew the nut one or two flats. Fit the split pin.
I say one or two flats because there is always a bit of give in the thread clearance, thrust washer etc., the thread starts at a different place in each nut and it varies a little from wheel to wheel. It also depends how heavy handed you are with the instruction take up the slack. For those who are willing and able, the endfloat should be about 2-4 thou (0.002 - 0.004").
For the pedantic, Im aware of variations on this and Im aware of the small difference in cost of a replacement hub compared to a bearing set but Ive simply attempted to outline the method. If there are any omissions, just use common sense.
Greases: There a various water resistant greases and some are not mixable. In the absence of technical info, its probably best to stick to one you know you can get in the future so that mixing doesnt occur at servicing time.
__________________
JW.
|
|
|
|
|
24 April 2007, 00:19
|
#17
|
|
Member
Country: UK - England
Town: Fareham
Length: 6m +
Join Date: Sep 2003
Posts: 7,866
|
Jeees JW. You looking for a job at Haynes . Perhaps you're already working for em?
__________________
Andy
Looks Slow but is Fast
Member of the ebay Blue RIB cover club.
|
|
|
|
|
24 April 2007, 01:14
|
#18
|
|
Member
Country: UK - Scotland
Make: HumberOceanOffshore
Length: 8m +
Engine: Volvo KAD300/DPX
Join Date: Oct 2002
Posts: 5,596
|
I wish!
__________________
JW.
|
|
|
|
|
24 April 2007, 04:08
|
#19
|
|
Member
Country: Canada
Town: Tobermory, Canada eh
Boat name: Verius
Make: Zodiac Hurricane 590
Length: 5m +
Engine: Yamaha F150
Join Date: Oct 2006
Posts: 1,366
|
In light of JW's lengthy posts, I am even more convinced that my $75 at "Ye Olde Tyre Shoppe" is an astonishingly good expenditure!
I used to do my bearings myself... It isn't difficult, but there comes a time in a man's life it is better to pay than putter!
|
|
|
|
|
24 April 2007, 08:23
|
#20
|
|
Member
Country: UK - England
Town: Surbiton,Gt London
Length: 5m +
Join Date: Nov 2003
Posts: 437
|
Thanks all hope to get the bits today or Wednesday and do the job at the weekend, while the old ones dont look too bad (as JW said) while its all appart and due to there age I think its worth the change . Took one off last night so i can get the correct replacements. I am happy to be learning this at home than on the side of the M25 at night and will be adding to tools on the can when towing now. Will post an up date when finished and if any one wants will get some pictures.
__________________
Neal
Remember It is only possible to live happy-ever-after on a day-to-day basis
|
|
|
|
|
|
 Posting Rules
|
You may not post new threads
You may not post replies
You may not post attachments
You may not edit your posts
HTML code is Off
|
|
|
|
 Recent Discussions
 |
|
|
|
|
|
|
|
|
|
|
|
|
|
|
|
|
|
|
|
|
|
|
|
|
|
|
|
|
|
|
|
|
|


 White Noise