 |
|
 18 July 2012, 19:20
|
#21
|
|
Member
Country: USA
Town: Oakland CA
Length: 3m +
Join Date: Feb 2005
Posts: 6,653
|
Quote:
Originally Posted by Peter_C

Something like this type of rasp works great.
|
Those roller/rasps (or analogs thereof) are available in auto stores (Pep Boys/whatever Kragen is called now) for about $2.50. I usually buy out their display (4 at a time) as I seem to have a knack for losing them for some reason.
jky
__________________
|

|

|
 20 July 2012, 02:29
|
#22
|
|
Member
Country: USA
Town: Jacksonville, Florida
Boat name: Blue Bomber
Make: Bombard
Length: 3m +
Engine: Outboard Nissan 8hp
Join Date: Jun 2012
Posts: 47
|
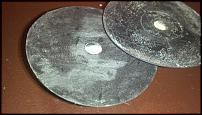
Thank everyone sooo much for their time and effort in advising mee. I have learned a lot form everyone. My goal is to have this boat back in service before our aug 7 vaca to the gulf of mex. I am now working on removing the glue from some of my black rubber accessories. See attached photo. Pcs on right in untouched. Pcs on left has been worked over with a dremel flapper wheel. I am having a hard time determining when i have removed the glue and don't know when to stop? Any advice?
__________________
|

|

|
 20 July 2012, 02:40
|
#23
|
|
Member
Country: USA
Town: Jacksonville, Florida
Boat name: Blue Bomber
Make: Bombard
Length: 3m +
Engine: Outboard Nissan 8hp
Join Date: Jun 2012
Posts: 47
|
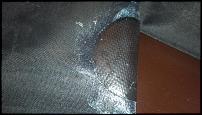
Center tube sta bond patches are holding strong. I followed everyones advice on these two patches. This area had a pin hole that i first tryed "loon" uv curable urethane from NRS that pealed off after two days.  I have a loon pin hole patch on one of the main tubes that is still holding strong after 5 days. ? I will be checking it closely over the next two weeks. I was able to patch it inside and out with uv cure loon from NRS.
__________________
|

|

|
 20 July 2012, 02:50
|
#24
|
|
Member
Country: USA
Town: Jacksonville, Florida
Boat name: Blue Bomber
Make: Bombard
Length: 3m +
Engine: Outboard Nissan 8hp
Join Date: Jun 2012
Posts: 47
|
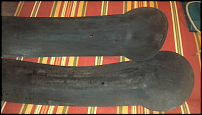
Black transom mount work will continue next. Top pcs has been worked but not sure if it is completely clean of glue. Bottom psc is "as peeled". Advice?
__________________
|

|

|
 20 July 2012, 06:20
|
#25
|
|
Member
Country: USA
Town: NorCal
Boat name: SHARKY
Make: AB
Length: 4m +
Engine: Honda BF75 & BF5
Join Date: Dec 2009
Posts: 2,113
|
Quote:
Originally Posted by MEE

|
When aesthetics are important you will want to tape off around the edges, and clean with some acetone after the patch has been placed. Hope that makes sense. For instance when gluing the transom and floor, you will be able to see the past glue lines. You can tape these off with masking tape before applying glue. After everything is installed you peel the tape and follow up with some acetone to clean the residual glue off.
The rest of the pics are just to hard to determine the next course of action. Probably need to hold them in my hand to get a true sense.
__________________
|

|

|
 20 July 2012, 16:23
|
#26
|
|
Member
Country: USA
Town: San Diego
Make: zodiac futura mk2
Length: 4m +
Engine: Nissan 40 plus
Join Date: Oct 2008
Posts: 269
|
Masking tape is definitely your friend! Your mek wipe, if you don't over do it, might lift an edge a bit. I just throw some more tape over it if the tape edge lifts. Be careful with the acetone or mek when cleaning. Excess solvent can affect the edge of your glued joint or seam.
It is always hard to see in a pic how clean a surface is. But the top rubber piece looks good and the lower does show some color like old glue. Can you get anything under your finger nail when you scratch along the piece other than rubber? I tend to go all out and make sure the surface is clean. If some small spot has some old glue on it will be surrounded by the rest of the bonded surface, but it is a weaker overall bond. Prep is everything if you want the repair to last.
Urethane pin hole patch material is okay. It works. How long do you want the repair to last? Where will you be taking the boat? I am going offshore in remote places, so I patch over any pinholes (fishing hook holes in my case). I need the abrasion resistance and the security of a full patch. Once your boat has a patch it just isn't such a big deal anymore! Just a suggestion. It is a personal preference.
Since you are shooting for a set date make sure you do any structural repairs first. You absolutely want everything to have time to cure. The specified 48 hours is a minimum. The glue continues to cure and the bond strengthens over a longer period of time. I try to wait 3-4 days on bonds like transom joints. This is particularly true if you overlap layers without giving each layer time to cure. Not absolutely required, but I always let underlying layers cure for a day or two before overlapping. If you do it all in one shot definitely give it time to cure.
I would say good luck, but it looks like you are doing what it takes to take luck out of the deal. Have fun!
__________________
|

|

|
 20 July 2012, 16:38
|
#27
|
|
Member
Country: USA
Town: Cali
Boat name: Thumper
Make: Avon CRRC 4.5
Length: 4m +
Engine: Merc 50
Join Date: Jun 2012
Posts: 422
|
Great advice Kelson, nice post mate.
Cheers, Don
__________________
|

|

|
 21 July 2012, 03:16
|
#28
|
|
Member
Country: USA
Town: Jacksonville, Florida
Boat name: Blue Bomber
Make: Bombard
Length: 3m +
Engine: Outboard Nissan 8hp
Join Date: Jun 2012
Posts: 47
|
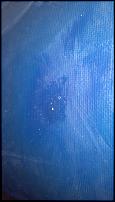
The main tube pin hole the i referred to was patched with Loon UV cure urethane sealant from NRS. It has been holding for a week now. It was prepped with MEK. This boat will be going several miles offshore in the gulf of mexico (FL) but will be with our other 20' boat at all times. The margins are holding up tight. See pic. I have been jumping up and down on the tube everyday as a stress screening test. Thanks again everyone for the great advice. More updates to come...
__________________
|

|

|
 22 July 2012, 16:23
|
#29
|
|
Member
Country: USA
Town: San Diego
Make: zodiac futura mk2
Length: 4m +
Engine: Nissan 40 plus
Join Date: Oct 2008
Posts: 269
|
Be sure to post up some more pics as the work progresses! I have learned a lot from checking out the repair pics and posts on the forum. There are so many different techniques or materials employed by other sib owners, it would be great to see how your repairs go.
__________________
|

|

|
 22 July 2012, 22:25
|
#30
|
|
Member
Country: USA
Town: Jacksonville, Florida
Boat name: Blue Bomber
Make: Bombard
Length: 3m +
Engine: Outboard Nissan 8hp
Join Date: Jun 2012
Posts: 47
|
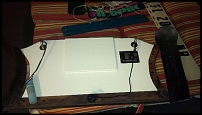
I think i am done with one transom mount. MEK and a brass bristle brush is worked the best.
__________________
|

|

|
 23 July 2012, 01:36
|
#31
|
|
Member
Country: USA
Town: Oakland CA
Length: 3m +
Join Date: Feb 2005
Posts: 6,653
|
Quote:
Originally Posted by kelson

Be sure to post up some more pics as the work progresses!
|
And be sure to post pics from the trip. 
jky
__________________
|

|

|
 23 July 2012, 02:39
|
#32
|
|
Member
Country: USA
Town: NorCal
Boat name: SHARKY
Make: AB
Length: 4m +
Engine: Honda BF75 & BF5
Join Date: Dec 2009
Posts: 2,113
|
MEE, what is the canister mounted on the transom for/do?
__________________
|

|

|
 23 July 2012, 02:54
|
#33
|
|
Member
Country: USA
Town: Jacksonville, Florida
Boat name: Blue Bomber
Make: Bombard
Length: 3m +
Engine: Outboard Nissan 8hp
Join Date: Jun 2012
Posts: 47
|
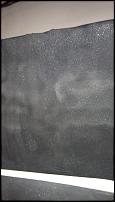
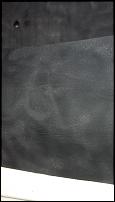
Finished working on the mounts ... for tonight. Working them with brass bristle brush MEK and paper towels. I tried to finish them off with a glass bead blaster. I think one is looking good. The other still feels / looks like it has some glue on it. The blasting is leaving a gritty finish on remaining glue while the bare rubber just turns matte and not so gritty. I guess i will go back to the brass bristle brush MEK and paper towels next.
__________________
|

|

|
 23 July 2012, 02:58
|
#34
|
|
Member
Country: USA
Town: Jacksonville, Florida
Boat name: Blue Bomber
Make: Bombard
Length: 3m +
Engine: Outboard Nissan 8hp
Join Date: Jun 2012
Posts: 47
|
O ring sealed Canister has a zip lock back inside with a copy of FL state vessel registration.
__________________
|

|

|
 25 July 2012, 03:16
|
#35
|
|
Member
Country: USA
Town: Jacksonville, Florida
Boat name: Blue Bomber
Make: Bombard
Length: 3m +
Engine: Outboard Nissan 8hp
Join Date: Jun 2012
Posts: 47
|
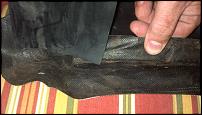
Finally got most if not all of the glue. I followed yalls advice and went back to the sand paper flapper wheel. However this time i used my AC powered dremel not the cordless.
In the picture i am showing the rear corner joint. This seams to be a tricky spot. It leaked here for years. How do you get this corner sealed up tight?
__________________
|

|

|
 26 July 2012, 02:41
|
#36
|
|
Member
Country: USA
Town: Jacksonville, Florida
Boat name: Blue Bomber
Make: Bombard
Length: 3m +
Engine: Outboard Nissan 8hp
Join Date: Jun 2012
Posts: 47
|
__________________
|

|

|
 27 July 2012, 00:25
|
#37
|
|
Member
Country: USA
Town: San Diego
Make: zodiac futura mk2
Length: 4m +
Engine: Nissan 40 plus
Join Date: Oct 2008
Posts: 269
|
Interesting. I have stuck to two part pvc glue for transom applications, but I don't doubt that G/Flex will bond big time. It's not like those joints are going to get rolled up (the G/Flex is stiffer than two part glue when cured), but you sure aren't going to get them apart in one piece again either!
I use G/Flex a lot to bond odd materials like pe foams. That stuff is impressive.
__________________
|

|

|
 27 July 2012, 05:59
|
#38
|
|
Member
Country: USA
Town: Jacksonville, Florida
Boat name: Blue Bomber
Make: Bombard
Length: 3m +
Engine: Outboard Nissan 8hp
Join Date: Jun 2012
Posts: 47
|
My transom is coated with epoxy as it had some water damage. It is my understanding that pvc glue like sta bond will not bond very well to the epoxy. That is why i went with the gflex on the mount to transom and the pvc floor to transom joints. Which made tonight. Ill send more pix tomorrow.
__________________
|

|

|
 29 July 2012, 23:50
|
#39
|
|
Member
Country: USA
Town: Jacksonville, Florida
Boat name: Blue Bomber
Make: Bombard
Length: 3m +
Engine: Outboard Nissan 8hp
Join Date: Jun 2012
Posts: 47
|
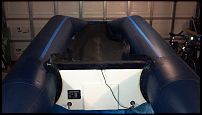
After days of rebuilding the transom and removing old glue we are finally ready to glue the fool back into the blue bomber. BTW liberal amounts of lacquer thinner and a brass bristle wire brush turned out to be the most effective for me. More pix later.
__________________
|

|

|
 30 July 2012, 04:42
|
#40
|
|
Member
Country: USA
Town: Jacksonville, Florida
Boat name: Blue Bomber
Make: Bombard
Length: 3m +
Engine: Outboard Nissan 8hp
Join Date: Jun 2012
Posts: 47
|
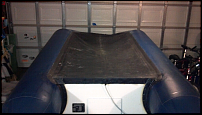
The floor is adhered. It took about 350 cc of sta bond including accelerator. Thanks again for all the advice.
__________________
|

|

|
 |
|
 Posting Rules
|
You may not post new threads
You may not post replies
You may not post attachments
You may not edit your posts
HTML code is Off
|
|
|
|
 Recent Discussions
 |
|
|
|
|
|
|
|
|
|
|
|
|
|
|
|
|
|
|
|
|
|
|
|
|
|
|
|
|
|
|
|
|
|