Then started on the electrics
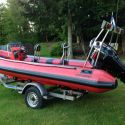
Final list of stuff is:
2 x Raymarine Axiom 9” screens, one just screen only, the other with the fancy downvision sonar thing. I’ve never fished in my life but being able to see the sea bottom in 3D seems cool
Raymarine AIS800 Class B+ with vhf splitter
Raymarine RAY90 blackbox VHF
Raymarine Evolution Autopilot (ACU150 and 1 litre pump, P70RS control. I didn’t want a control but it was cheaper buying a kit than the bits individually)
Fusion BB-100 blackbox radio + remote
Seatalk NMEA 2000 network
Mercmonitor engine gauge to do smartcraft -> n2k
RMK-9 remote keypad to control the screens if too rough for the touch screens
Seatalk HS5 switch to connect it all together
I bought a Quantum Radar very cheaply that was badly advertised on eBay, but it looks massive and I’ve no idea how I’m going to mount it. The scan strut brackets are stupidly expensive so I’m going to have to fashion my own.
All this stuff was carefully bought over the last few months, most of the Raymarine gear came from Hudson Marine in the Rayamrine sale who were brilliant to deal with. Coastal Rides had some very good value refurbished Ray stuff. Cables all bought from eBay for a fraction of retail price.
Bought the Mercmonitor from US eBay.

I’m really having to squeeze stuff in as the console is pretty small and I really want to get the batteries, the Mercury power steering pump and the autopilot pump in the console. The batteries and pump used to be in the back of the boat at the transom but that seemed a dumb idea.

Put some of the n2k network together to work out what cables I needed, there’s a lot of n2k stuff to connect

8 drops plus power

I don’t like the fact the batteries are different sizes

may have to replace the optima as I think it’s not in great health anyway

The power steering pump is going to have to sit here

So question time - is it going to be a problem having the Autopilot compass much closer to other electronics than the instructions recommend? I’ve kept it as high and far away as possible, but short of putting it in a bow locker I don’t know what else I could do


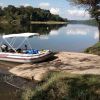
 Mavi Su
 White Noise

 going to be a squeeze but I can wire it all up on the bench and then move the console to the boat once its all done.


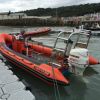
 Red Mist


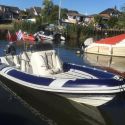
 Tickler