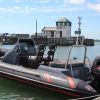
Finally got round to getting my searider refurb started this week! Got the boat and trailer last year for not alot of money and had some good fun out with an old yamaha 40 I got hold of. Been collecting bits and bobs from last year so I reckon now is the time to start getting it looking a bit more respectable:-)
We started off by repairing a cut in one of the baffles last year when I first got the boat - was quite a tricky repair with some internal surgery but well worth it as all 3 chambers are now sound.
So far this week weve replaced the valves, removed all external patches and put them on the inside, removed all grab handles, loop patches, bow dodger, bow bag and rubbing strake. Spent the last couple of days buffing the boat and new strake in preparation for fitting..........
Got up first thing this morning to fit the new heavy duty strake - as predicted heavens opened and started pissing down - luckily we got the last bit of strake attached to the boat seconds before - turned out well though.
will update with some more pics when we get the new console etc fitted.
I bet it will end up looking great with the amount of work you are putting in. I know what it takes to "save" the tubes. However, I have not been brave enough to put the patches on the inside. How you do dat? Are you going to clean up the deck or paint it?
__________________
Running around like a head with it's chicken cut off.
Yes hopefully it will turn out quite good for an old boat - I cant take credit for the internal patches iam afraid as my brother has done all the tricky stuff as he used to work with life rafts etc.
Having seen him do it he basically gained access through the hole the patch is covering or other areas that wont be seen then after much swearing and fiddling about with polythene on the inside it gets done.
The deck is actually in quite good condition as was recoated in white by the previous owner - it was originally orange. All the dust on the inside is from the tubes after 2 days of buffing.
Yet another day spent buffing and glueing:-) Put on 4 of the old grab handles which will now be used for holding the paddles on the sides of the tubes. Also put on another 5 new grab handles so should be no shortage of places to hang on to.
Done a quick dry run with the new console and realised my steering cable is going to be about 2ft too short.!Damn! Only bought it last year and only been used a few times - dont suppose theres anyone out there with a 12ft teleflex steering cable that fancies a swap for a 10ft one?
lol..... Cheers Fred - I did consider getting one of those and after I could chop it up and make it into a nice canopy like one of these for when it gets too hot in Glasgow!
The old strake came off easily with a little help from the heat gun - found it best to apply as little heat as possible as most of it just pulled off with only a few bits needing to be prised away with a pusher - main thing is to try and not take the surface of the hypalon off with the strake but had no problems with that considering the original strake had been on the boat from new. After removing the strake came the hard work of buffing where the original strake had been and the overlap where the much bigger strake was fitted - used a 80 grit sanding flapwheel with all the buffing on the boat.
New strake went on surprisingly easily considering it was so thick and heavy - marked where it was to go using the outline of the old strake as a guide. Cut the end of the strake using a compound mitre saw to get a nice neat 45 degree angle then curved the ends up to the D just using some scissors. Went round the bow no problem as there was a little bit of stretch in it and it was quite warm sitting in the sun before we fitted it so I reckon that helped as well.
All the stuff for the tube refurb hasnt been very expensive as ive picked it up from ebay etc over the last year. The strake, valves, handles, paint and glue etc has come in under a couple of hundred quid so not too bad although if I never had the help and know how of my bruv I reckon it would probably cost a small fortune considering the hours ive put in as well.
It is alot less daunting being shown what to do by someone who knows what they are doing but if you are thinking about doing it yourself I would say give it a go as its not that difficult!